 By Daniel Cooper
Light is the most fundamental element of photography. Understanding how to work with different lighting conditions and create your own lighting setups can dramatically elevate your images from amateur to professional quality.
In this comprehensive guide, we'll explore the spectrum of lighting techniques available to photographers, from making the most of natural light to setting up complex studio lighting configurations. No matter your equipment budget or experience level, you'll find practical advice to improve your lighting skills.
The Fundamentals of Light
Before diving into specific techniques, it's essential to understand the basic characteristics of light that affect your photographs:
Quality of Light
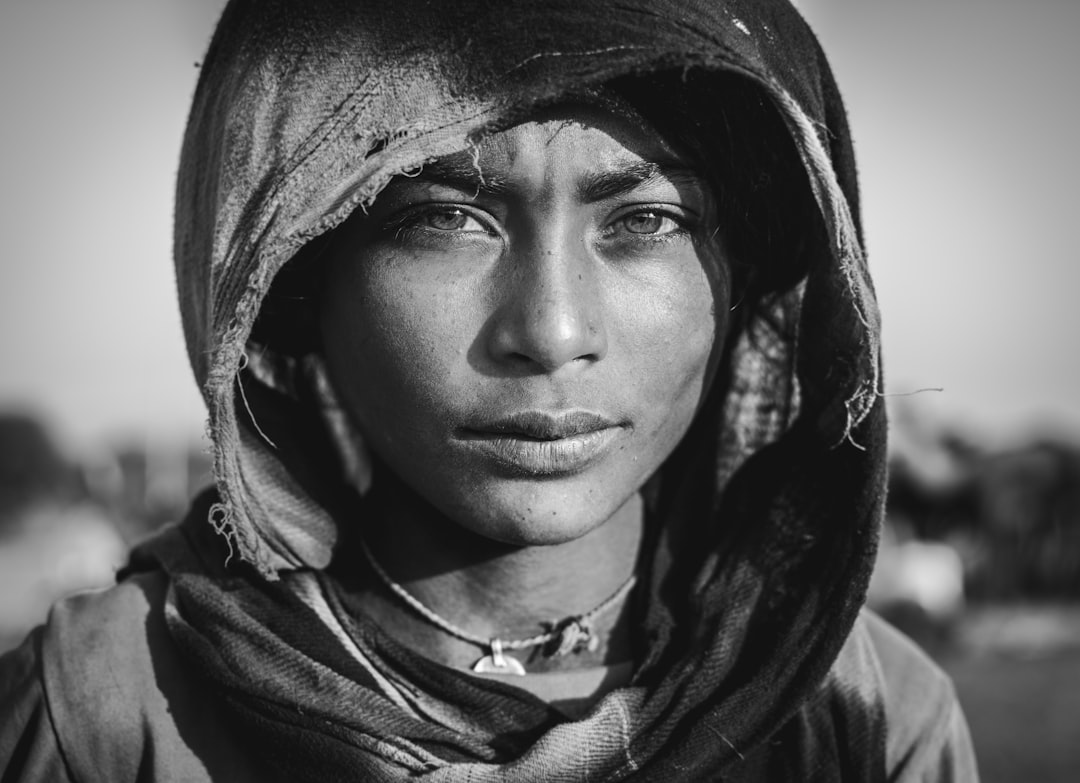
- Hard light creates strong, defined shadows and high contrast. It's produced by small, direct light sources like the midday sun or a bare speedlight.
- Soft light creates gentle, diffused shadows and lower contrast. It comes from large light sources or small sources modified by diffusers, like an overcast sky or a softbox.
Direction of Light
- Frontal lighting (light coming from behind the camera) tends to flatten features but reveals detail.
- Side lighting emphasizes texture and creates a three-dimensional effect through shadows.
- Back lighting creates silhouettes and rim light effects, adding drama and separation from backgrounds.
- Top lighting can create unflattering shadows under eyes and nose when used directly, but can be beautiful when slightly angled.
- Bottom lighting creates an unnatural, sometimes eerie effect as it reverses the natural shadow patterns we're accustomed to seeing.
Color Temperature
Light has color, measured in Kelvin (K). Understanding color temperature helps you achieve proper white balance and create specific moods:
- Candle light: ~1900K (very warm, orange)
- Tungsten/incandescent bulbs: ~2700-3300K (warm, yellow)
- Sunrise/sunset: ~3000-4000K (warm, golden)
- Electronic flash: ~5500-6000K (neutral)
- Noon daylight: ~5500-6500K (neutral to slightly cool)
- Overcast sky: ~6500-7500K (cool, bluish)
- Shade: ~7000-8000K (cooler, more blue)
"Light makes photography. Embrace light. Admire it. Love it. But above all, know light. Know it for all you are worth, and you will know the key to photography."
— George Eastman, founder of Kodak
Working with Natural Light
Natural light is free, readily available, and can be stunningly beautiful when you know how to use it effectively.
Golden Hour
The hour after sunrise and before sunset provides magical, warm, directional light that flatters subjects. During golden hour:
- Position subjects so the low sun creates a pleasing side or back lighting effect
- Use the warm glow to create a romantic or nostalgic mood
- Look for opportunities to use lens flare creatively
- Work quickly as the light changes rapidly during these times
Blue Hour
The short period just before sunrise or after sunset when the sky takes on a deep blue tone can create striking images, especially for landscapes and cityscapes. During blue hour:
- Use a tripod for the longer exposures required
- Balance artificial lights (like city lights) with the blue ambient light
- Consider silhouettes against the blue sky
Overcast Days
While many beginners avoid shooting on cloudy days, the soft, diffused light can be perfect for portraits, macro photography, and reducing harsh contrast in landscapes. On overcast days:
- Take advantage of the even light for portraits without harsh shadows
- Use the clouds as a giant softbox for beautifully diffused light
- Include the sky minimally unless the cloud formations add interest
- Consider black and white conversion, which often works well with the lower contrast
Window Light
Window light is a favorite among portrait photographers for its beautiful quality and accessibility. When working with window light:
- Position your subject at various angles to the window to create different lighting patterns
- Use the window size and distance to control the light's softness
- Add a reflector on the shadow side to soften contrast if desired
- Control light with curtains or blinds to shape and direct it
Pro Tip
When shooting in bright sunlight, look for areas of open shade (like under trees or alongside buildings) to place your subjects. This provides soft, even lighting while still allowing the background to be well-exposed.
Modifying Natural Light
Even without artificial lighting equipment, you can shape natural light to improve your photos:
- Reflectors bounce light into shadow areas, reducing contrast and adding catchlights in eyes. They come in various colors (white, silver, gold) for different effects.
- Diffusers (like a translucent fabric panel) placed between the sun and your subject convert harsh direct sunlight into soft, flattering light.
- Negative fill (black panels that absorb light) can increase contrast and drama by deepening shadows.
Introduction to Artificial Lighting
Artificial lighting gives you complete control regardless of time, weather, or location. Let's explore the most common types:
Continuous Lighting
Continuous lights stay on constantly, allowing you to see exactly how the light affects your subject before taking the photo. Options include:
- LED panels: Energy-efficient, cool-running, and often adjustable in brightness and color temperature.
- Tungsten lights: Traditional hot lights that produce warm light. Affordable but generate significant heat.
- Fluorescent: Cooler than tungsten with good color rendering capabilities when using photography-specific bulbs.
Advantages of continuous lighting include:
- What you see is what you get – no guesswork
- Works for both photography and video
- Easier for beginners to learn lighting principles
- Creates consistent catchlights in the eyes for portraits
Flash/Strobe Lighting
Flash units produce a brief, powerful burst of light. They come in various forms:
- Speedlights (hot-shoe flashes): Portable units that can be mounted on your camera or used off-camera with triggers.
- Studio strobes: More powerful units designed for studio use, often with modeling lights to preview the effect.
- Battery-powered monolights: Studio-quality lights with built-in batteries for location work.
Advantages of flash lighting include:
- More power, allowing you to overpower the sun or light larger spaces
- Freezes motion with extremely short duration
- Consistent output regardless of ambient conditions
- Better battery efficiency for extended shooting sessions
Basic One-Light Setups
A single light source, when used effectively, can create professional results. Here are some classic one-light setups:
Paramount/Butterfly Lighting
Position the light above and slightly in front of the subject, pointing downward. This creates a butterfly-shaped shadow under the nose and is flattering for subjects with defined cheekbones and jawlines.
Loop Lighting
Place the light slightly above eye level and about 45° to the side of the camera. This creates a small "loop" shadow from the nose on the cheek and works well for most face shapes.
Rembrandt Lighting
Position the light higher and more to the side until the shadow from the nose connects with the shadow on the cheek, creating a distinctive triangle of light on the shadowed side of the face. This creates a dramatic, artistic effect.
Split Lighting
Place the light 90° to the side of the subject, illuminating exactly half the face while leaving the other half in shadow. This creates a dramatic, moody effect that emphasizes texture and shape.
Rim/Back Lighting
Position the light behind the subject, creating a glowing outline while leaving the front in relative shadow. This creates separation from the background and a dramatic silhouette effect.
Light Modifiers
Light modifiers shape and control your light source, dramatically affecting the quality of light:
Diffusers
- Softboxes: Create soft, directional light with a natural-looking catchlight. Come in various shapes and sizes.
- Umbrellas: Affordable and versatile modifiers that spread light widely. White umbrellas diffuse light; silver ones reflect it with more contrast.
- Octaboxes: Round softboxes that create round catchlights, similar to natural window light.
Reflectors and Bouncers
- Beauty dish: Creates a light quality between soft and hard, with distinctive circular catchlights. Popular for fashion and portrait work.
- Bounce cards: Simple white surfaces that redirect light, softening it slightly.
Restrictors
- Grids: Honeycomb-like attachments that narrow the beam of light, creating a spotlight effect.
- Barn doors: Adjustable flaps that control light spill and shape the beam.
- Snoots: Tube-like attachments that create a narrow circle of light.
- Gobos/Cookies: Templates that cast shadow patterns when light passes through them.
Multiple Light Setups
As you become comfortable with one-light setups, you can add complexity with multiple lights for more control and creative possibilities.
The Three-Point Lighting System
This classic setup forms the foundation of most lighting arrangements:
- Key light: The primary light source, usually positioned at a 45° angle to the subject.
- Fill light: A softer light placed opposite the key light to fill in shadows, usually at lower power.
- Rim/hair light: Positioned behind the subject to create separation from the background and highlight contours.
Background Lighting
Adding a fourth light to illuminate the background provides complete control over your scene:
- Use even lighting for a clean, studio look
- Create a gradient effect by positioning the light to one side
- Add gels for colored backgrounds without needing colored paper
- Project patterns using gobos or other templates
Creative Lighting Techniques
Once you've mastered the basics, experiment with these creative techniques:
Light Painting
Using a long exposure and moving light sources (like flashlights or LED wands) to "paint" light onto a scene or subject. This technique allows for complete creative freedom in directing light.
Color Gels
Colored filters placed over lights to change their color output. Use complementary colors (blue/orange, purple/yellow) for dynamic contrast or matching colors for a cohesive theme.
Hard Light Techniques
While soft light is often favored, hard light can create dramatic, high-contrast images with strong shadow definition. Try using bare speedlights or small modifiers positioned to create interesting shadow patterns.
Low-Key and High-Key Lighting
- Low-key lighting uses predominantly dark tones with selective lighting on specific areas, creating a moody, dramatic effect.
- High-key lighting uses bright, evenly lit scenes with minimal shadows, creating a clean, airy, often optimistic mood.
Practical Tips for Better Lighting
- Start simple: Master one-light setups before adding complexity.
- Study shadows: Shadows reveal the quality and direction of light—learn to "read" them.
- Test and adjust: Take test shots and make incremental adjustments rather than major changes.
- Create depth: Use lighting ratios (different power levels between lights) to create three-dimensional depth.
- Keep notes: Document successful setups with diagrams or behind-the-scenes photos for future reference.
- Develop consistency: Learn to replicate your favorite lighting styles for a consistent portfolio.
Conclusion
Lighting is both a technical skill and an art form. While this guide provides a foundation, true mastery comes through practice, observation, and experimentation. Begin with understanding the fundamental principles, then develop your unique lighting style that serves your creative vision.
Remember that great lighting isn't about using the most expensive equipment or the most complex setups—it's about using light intentionally to create the mood and effect you want. Whether you're working with natural window light or a full studio setup, the principles remain the same.
What lighting techniques are you most excited to try? Share your experiences and questions in the comments below!
Comments (3)
Robert Miller
July 7, 2024 at 9:15 AMThis is exactly what I needed! I've been struggling with lighting for my product photography and the section on one-light setups is going to be so helpful. Can't wait to try the techniques with my softbox.
Sophia Chen
July 6, 2024 at 4:22 PMI never really understood the difference between all the lighting patterns before. The explanations about Rembrandt, butterfly, and loop lighting make so much sense now! Do you think it's worth investing in studio strobes or should I start with speedlights?
Daniel Cooper Author
July 6, 2024 at 5:30 PMHi Sophia! Great question. For most beginners, I'd recommend starting with a couple of speedlights and some basic modifiers (softbox, umbrella). They're more affordable, portable, and versatile for learning. Once you're comfortable with the fundamentals and know what kind of photography you'll focus on, you can consider studio strobes if you need more power or faster recycling times.
Leave a Comment